
How to Print Barcode Labels for WooCommerce Products
Learn how to select products, set label copies, preview a barcode and print with Alharthiweb Barcode Labels. Start with Free and explore optional Pro tools.
Start with a product label, not a shipping label
A product label helps you put a recognizable name and barcode on an item or shelf. It serves a different purpose from a courier shipping label. This guide starts with products already in your WooCommerce catalog and takes one of them through preview and the browser print workflow.
You can complete the basic workflow with the Free edition of Alharthiweb Barcode Labels. Start with one product and a small test run before preparing a batch. The screenshots below show synthetic demo products, not customer information.
What you need before you start
Use WordPress 6.4 or later, PHP 7.4 or later and WooCommerce 8.2 or later. These are the plugin’s declared minimum requirements, not a promise that every combination of versions, themes and printers has been tested.
Add the products you want to label in WooCommerce first. Check that the product name and identifier are correct. Choose an existing SKU compatible with the barcode format, or use the product ID option when appropriate. A barcode represents an identifier; this plugin does not issue retail GTINs.
- Open Plugins → Add New and search for Alharthiweb Barcode Labels.
- Install and activate the Free edition with WooCommerce active. Free printing does not require a paid license or an optional Freemius account.
- Open WooCommerce → Alharthiweb Barcode Labels.
1. Select a product and preview its label
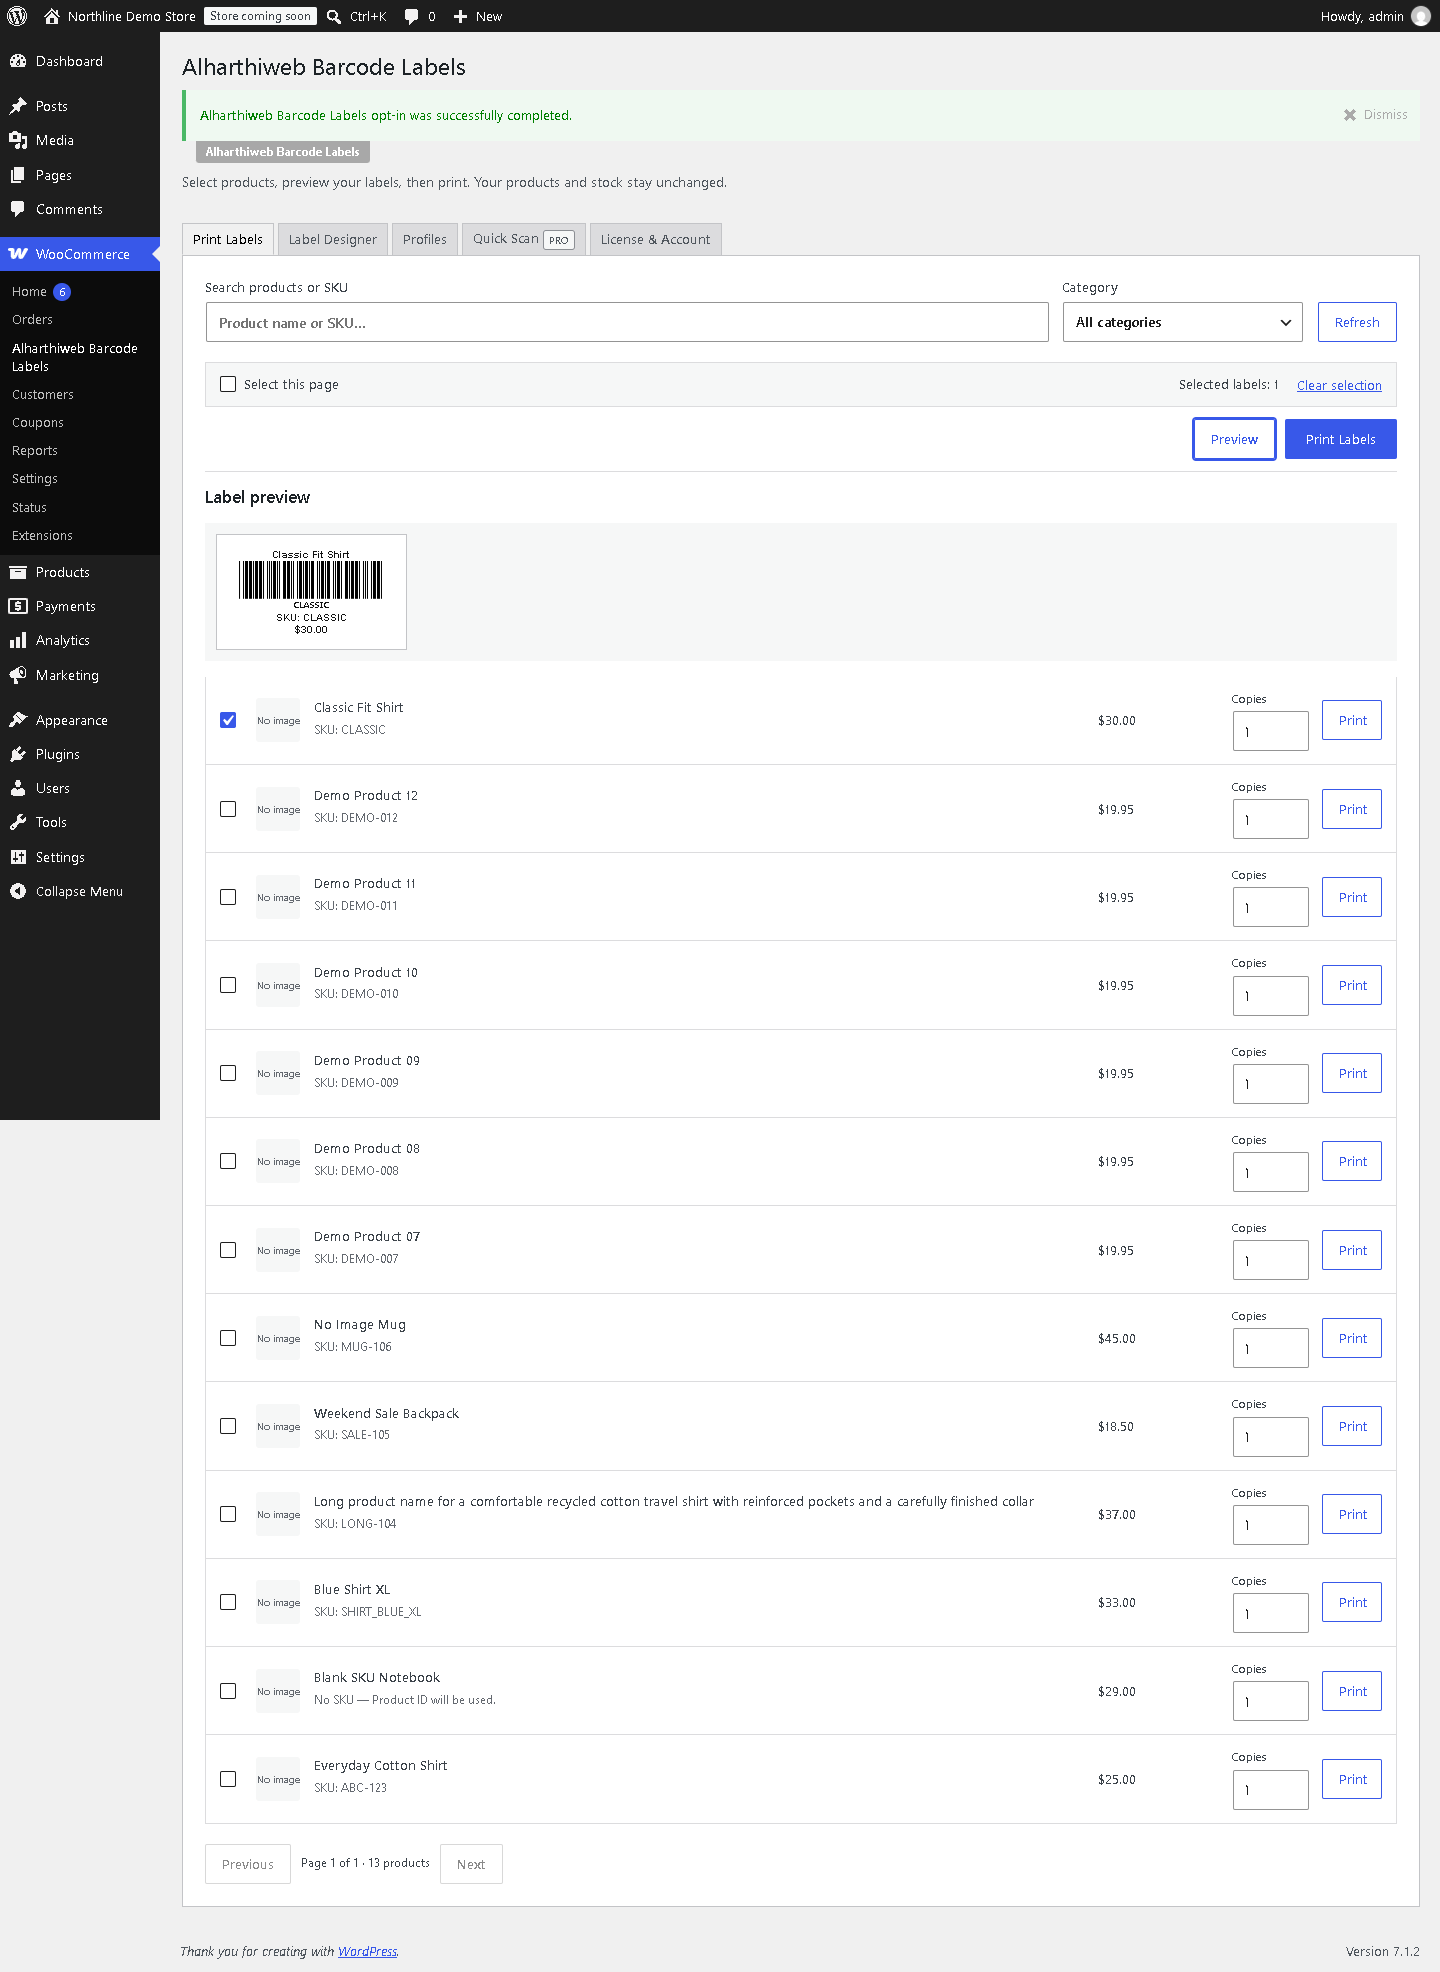
Find the product you want to label and tick its selection box. Click Preview to inspect the label before opening the print document. Confirm the product name, barcode and any displayed price belong to the intended item.
For a batch, explicitly select the products you need. Do not assume every product in the catalog has been selected merely because it appears in the list. Start with one product so you can check the setup clearly.
2. Choose the number of copies for each product
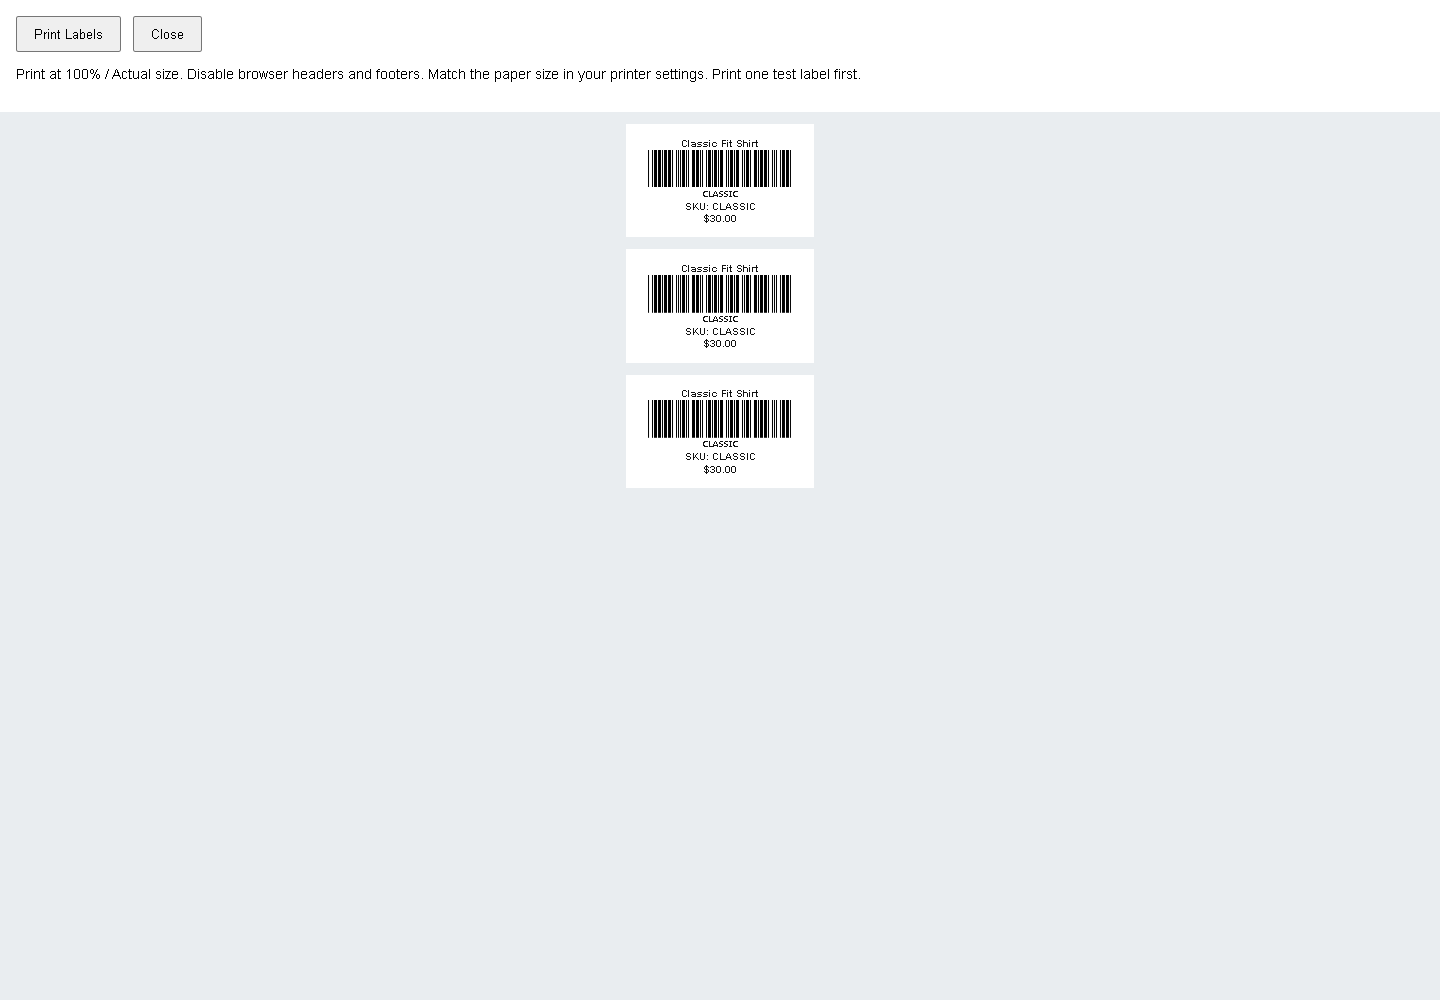
Set Copies to the number of labels you need for each selected product. Three copies is just the example shown in our demonstration; it is not a three-label limit. You can choose a different quantity for the job.
Version 0.4.5 limits a print job to 5,000 labels to protect browser memory and asks for confirmation above 500. Split larger jobs into smaller runs. These safeguards apply to both editions; they are not an upgrade paywall.
3. Match the label size and choose visible fields
Open Label Designer and choose a preset suited to your label stock. For example, the 40 × 25 mm and 50 × 30 mm presets give you a starting point. Check the dimensions against the actual paper or roll in your printer; the preset is not a claim of automatic compatibility with every printer model.
Watch the live design while changing fields. A price may be useful on a shelf label, while a simpler stockroom label may not need it. Toggle Price and check that the preview contains the information you want. Review the design again after changing dimensions.
4. Open the print layout and check the first label
Return to the printing screen, preview the selected products and click Print Labels. The plugin opens its real print document. Use Print Labels in that document to open the browser’s print dialog.
Select your printer and matching paper size. Use 100% or Actual size when available, disable browser headers and footers, and check margins before printing. Inspect the barcode and text in the print preview. Print a single test label before a larger run.
If you use a scanner, scan the physical test label into a plain text field and compare the result with the intended identifier, including leading zeros. Browser previews and PDF decoding do not replace testing your own printer, stock and scanner together.
Practical checks when a label does not look right
If the output is clipped, compare the label dimensions, selected paper and margins. Avoid shrinking a barcode simply to make a mismatched layout fit; correct the layout and test again.
If the plugin reports an incompatible barcode value, review the selected identifier and format. Do not remove characters from an existing SKU merely to make a barcode render. Keep your stored product identifiers intact and choose a suitable supported source or format.
If the browser print window does not appear, check whether your browser blocked the new print window. Keep the plugin tab open while reviewing the print document.
What Pro adds to this workflow
The Free edition covers the preview, copy selection, selected-product batch, label presets and visible-price workflow above. Pro is optional for this tutorial.
If your identifiers need Code 128, the licensed Pro edition adds that format for preview and printing. Pro also lets you save a printer design as a profile and apply it again to restore the saved dimensions and barcode format.
Use one edition at a time. When upgrading, deactivate Free, install the Premium ZIP from your Freemius purchase account and activate your license through License & Account inside the plugin. Keep a site backup before changing plugins.
Frequently asked questions
Can I print more than three copies? Yes. Three is an example. Set the needed quantity within the print-job safeguards described above.
Do I need Pro to remove the price? No. The demonstrated Price field control is available in Free.
Does this create official retail barcode numbers? No. It renders supported existing identifiers; it does not allocate GTINs.
Will it work with every physical printer? Check your own label stock, paper settings and scanner with a small test. We do not claim universal hardware compatibility.
Can I save a PDF? If your browser or operating system offers Save as PDF in its print dialog, you can use that destination to inspect the output before sending it to a printer.