
A country flag beside a phone field is a helpful cue, but it does not prove that a form saves the intended number. Before launch, test country selection and phone entry on the actual form. Alharthiweb Phone Country Code Free provides selection and normalization; the form or checkout still controls submission and storage.
1. Identify the form you are testing
Use a staging copy or a clearly marked test form with synthetic data. Record its URL and whether it is a contact form, an ordinary telephone input or WooCommerce Classic Checkout. Check the rendered field, not just the form builder’s label.
The plugin recognizes editable telephone inputs and common phone-field conventions. Search, fax, hidden, disabled and read-only fields are not equivalent to ordinary phone fields. For WooCommerce, the documented integration is Classic Checkout billing_phone. Checkout Blocks and Store API validation are not supported.
2. Test an empty field and a manual selection
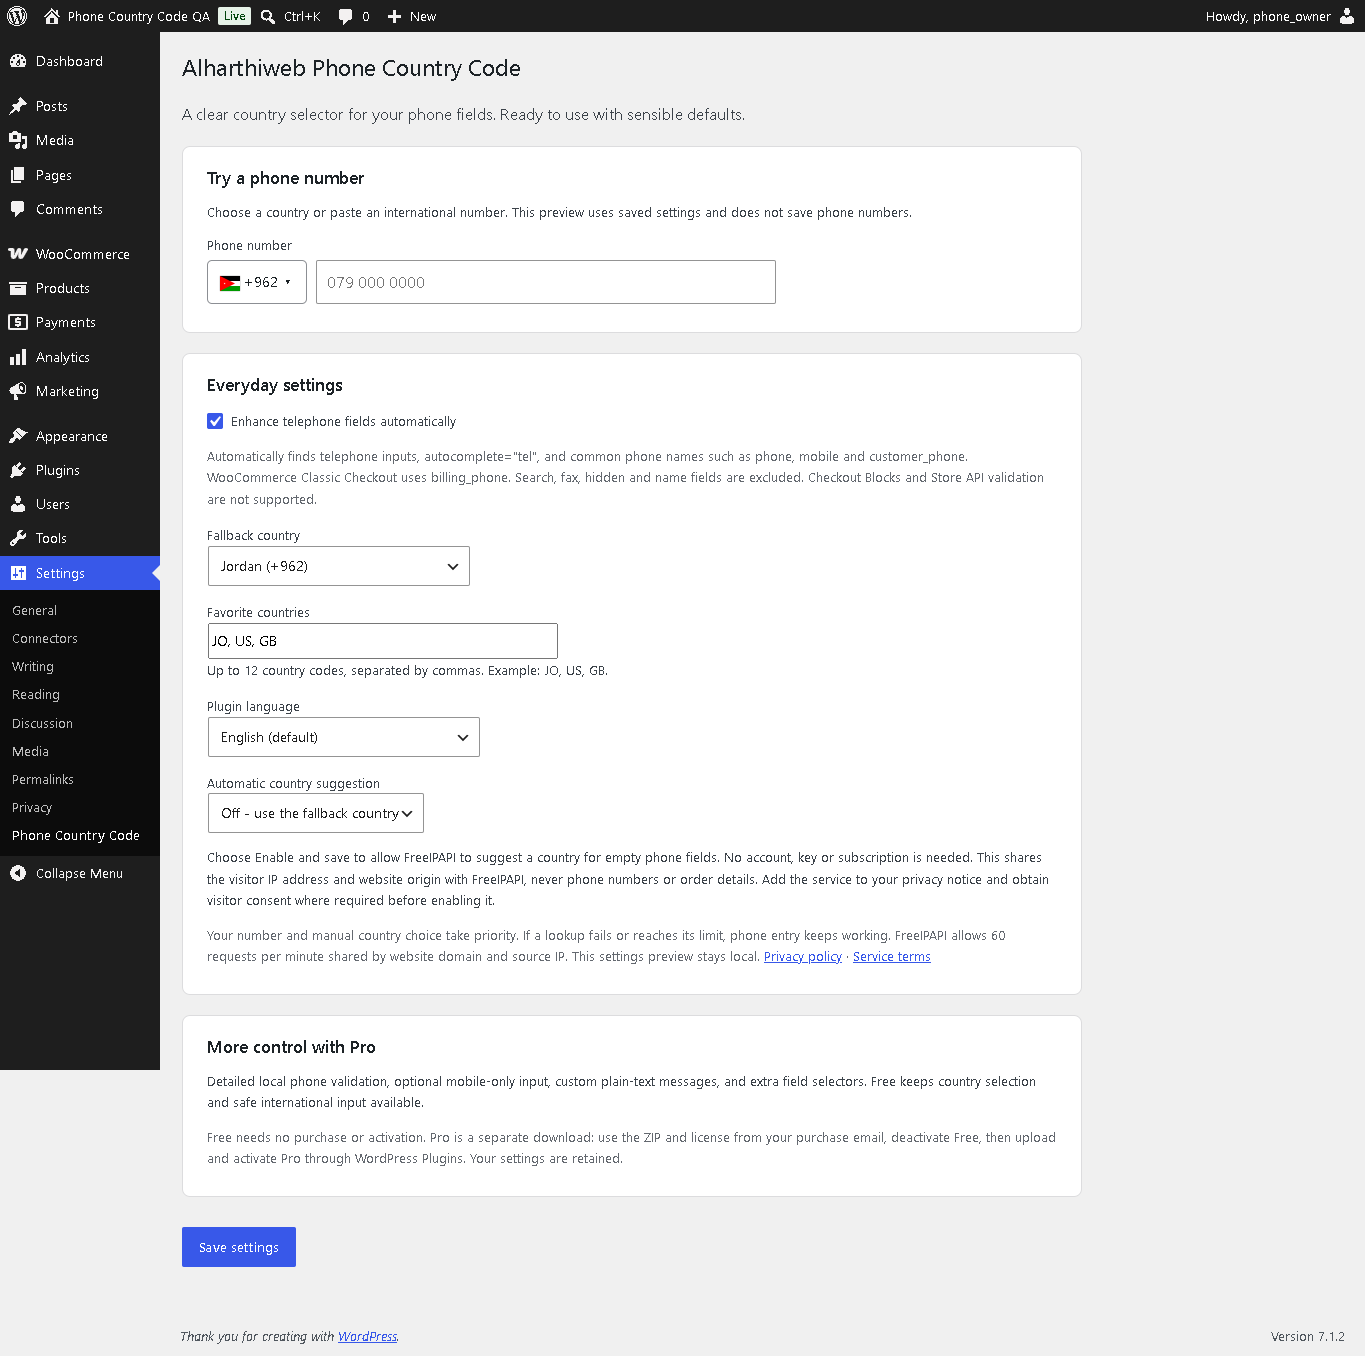
Open Settings > Phone Country Code, save a fallback country and useful favorites, then try the local preview. Leave optional IP country suggestion off for this first test so the starting conditions are easy to repeat.
On the actual form, open the country list, search for a country and choose it. Repeat using the keyboard. Confirm that the country list fits the screen and that the phone field remains usable on a mobile-sized browser.
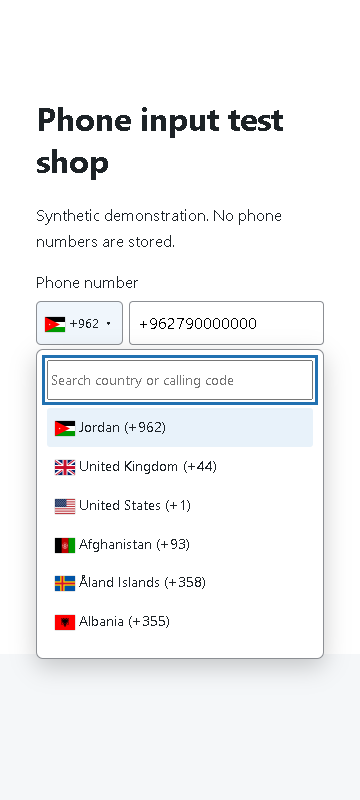
3. Test pasted international prefixes
Choose one country, then paste a synthetic international number with a different explicit prefix. Check a leading + and a leading 00 separately. The explicit prefix should take priority over the earlier selection; inspect the resulting value for a duplicated calling code.
Repeat the input using Arabic or Persian digits if those are common for your audience. Keep a note of the original test input and the displayed result. Do not use an actual customer’s contact details, and do not call or send messages to the sample number.
4. Check the submitted value
Leave the field and submit the test form through its normal workflow. Compare the value received by your own form handler or synthetic WooCommerce order with what you intended to enter. A correct-looking field does not by itself test another plugin’s storage rules or email formatting.
If the field is replaced after a checkout update or a dynamic form opens, repeat the interaction there. Test compatibility with the plugin that renders the input rather than assuming that all forms share the same markup.
5. Know what the result means
Free normalizes input; it does not reject every incomplete or impossible number. Detailed format validation is separate Pro functionality. Even a number that passes a format check has not been verified as existing, owned by the visitor or able to receive an SMS. No OTP service is included.
Finish with a small test record: form URL, desktop/mobile result, manual country selection, explicit prefix result and submitted value. Retest after changing the form plugin or checkout. Keep optional external country suggestion as a separate configuration decision, with its settings disclosure reviewed before enabling it.
Continue with the plugin
Explore Alharthiweb Phone Country Code, read the complete setup guide, or download Free from WordPress.org. This guide covers the Free workflow in version 1.8.7.
A tidy sidebar can still confuse a client if the link they need is hard to find. After arranging the WordPress admin menu, test a few real tasks before the handover. Alharthiweb Admin Organizer can group site tools while leaving everyday work directly accessible; this checklist checks the resulting experience.
1. Start from the client’s tasks
Write down three tasks the client actually performs, such as editing a page, uploading an image or reviewing an order. Map each task to its current WordPress screen. Keep frequently used destinations easy to reach and choose a plain group name for less frequent tools.
If you have not configured the layout yet, use the setup guide below. In Free, one named group and direct placement are sufficient for a simple handover. Do not introduce multiple groups or role layouts as though they were Free features.
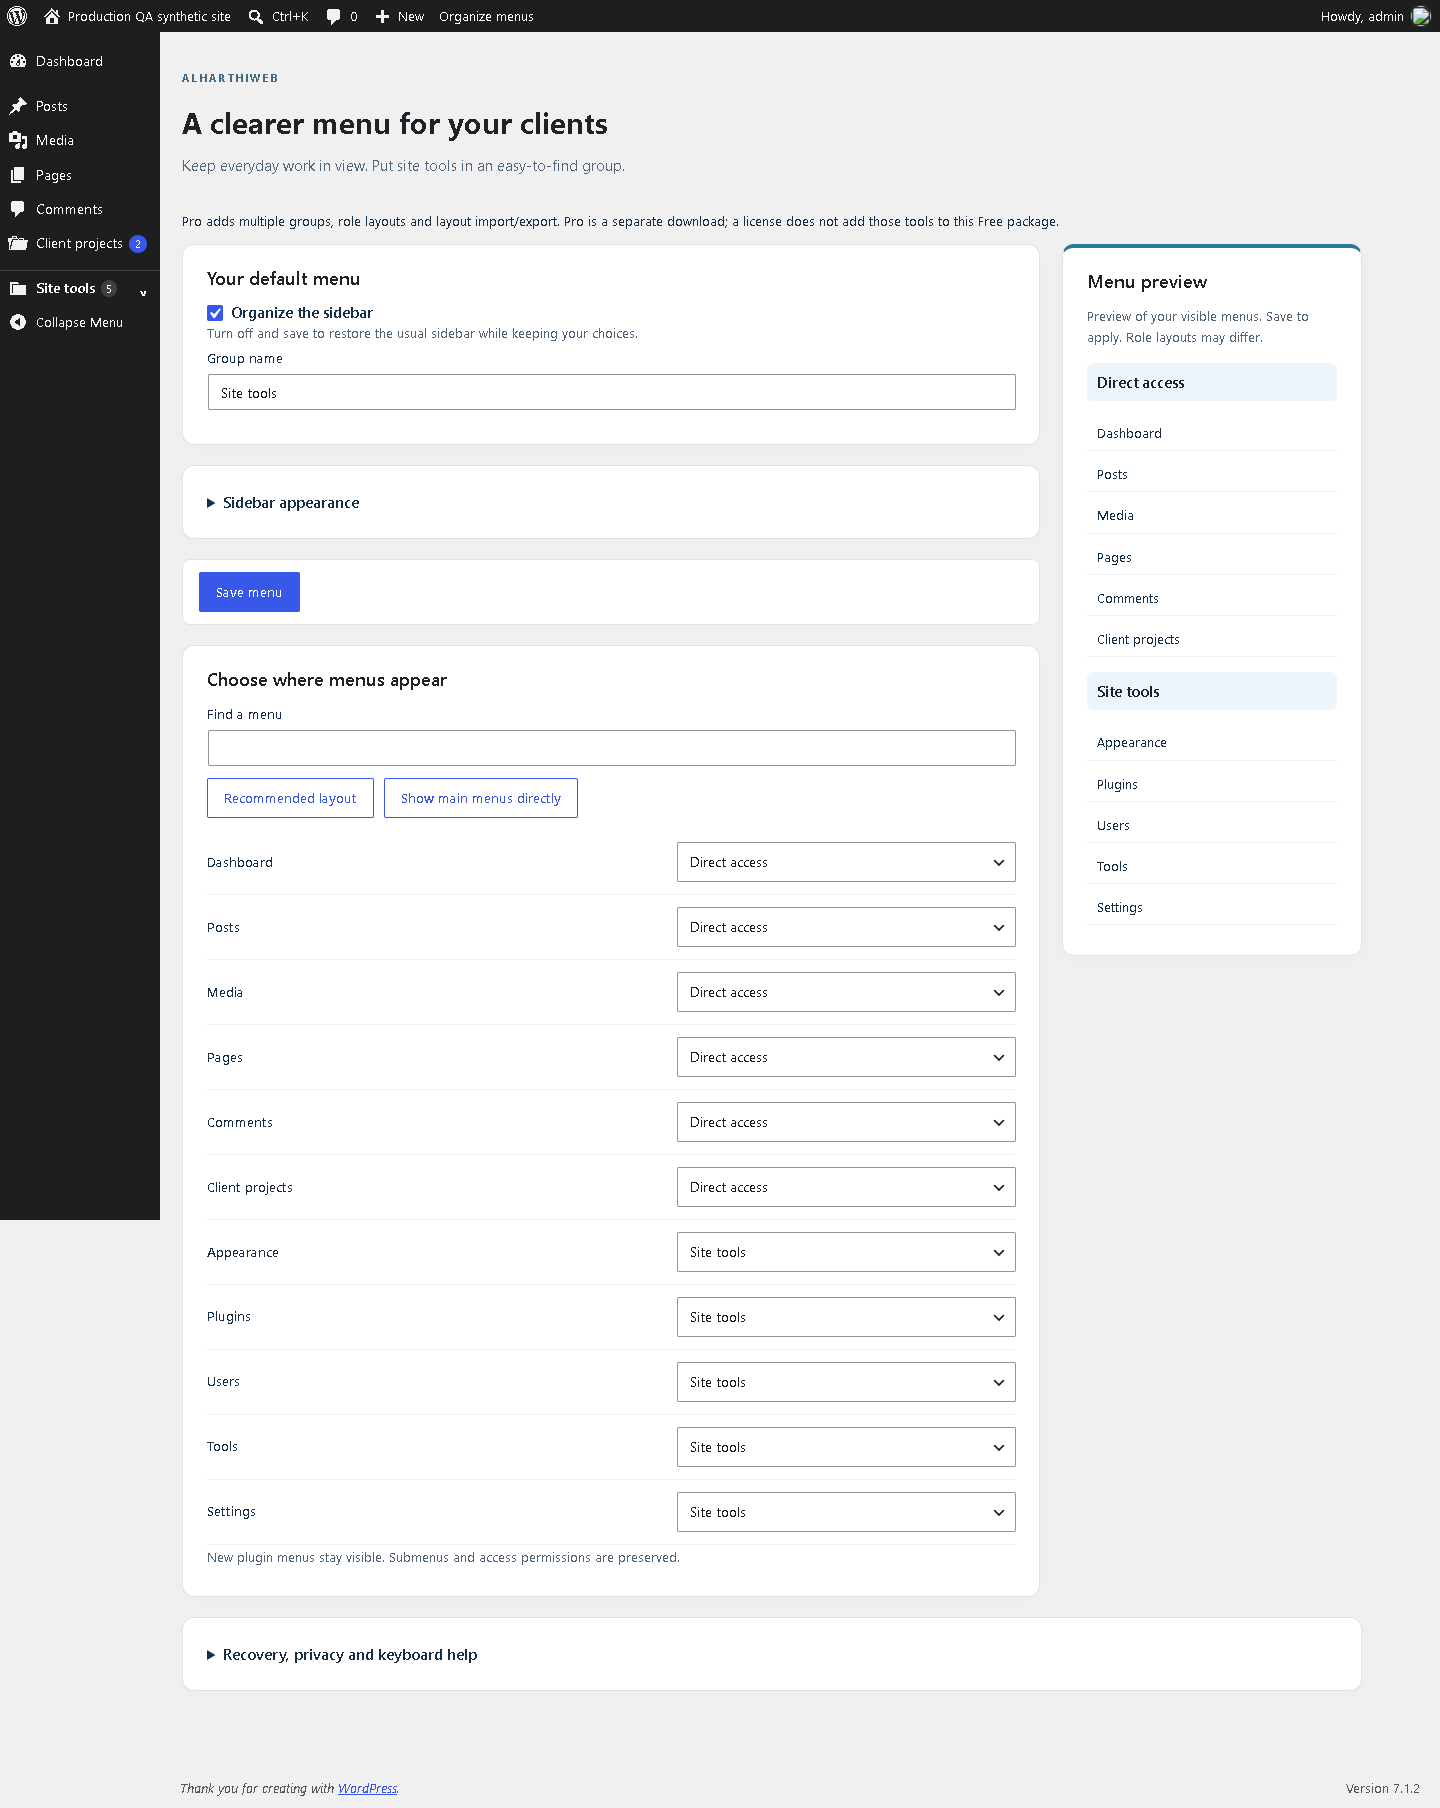
2. Check the intended account, not only the administrator
Use the client’s existing authorized account, or a staging account with the same intended role, to open the destinations on your task list. An administrator’s preview is not evidence that another role has permission to use every screen.
Admin Organizer changes presentation, not access control. A grouped or collapsed link does not secure the underlying page. If someone can access an inappropriate screen, review the site’s permissions separately; moving a menu is not a fix for that problem.
3. Follow submenu destinations
Open a menu and try the relevant submenu links. On a store, distinguish the operational Orders screen from an Analytics report with a similar name. The plugin uses registered WordPress menus, so test the actual destination rather than judging only by the sidebar label.
Check any plugin that replaces or heavily customizes the admin sidebar. Standard menu support does not guarantee that every third-party replacement behaves identically. Keep a note of any exception in the handover instructions.
4. Try keyboard navigation and a narrow window
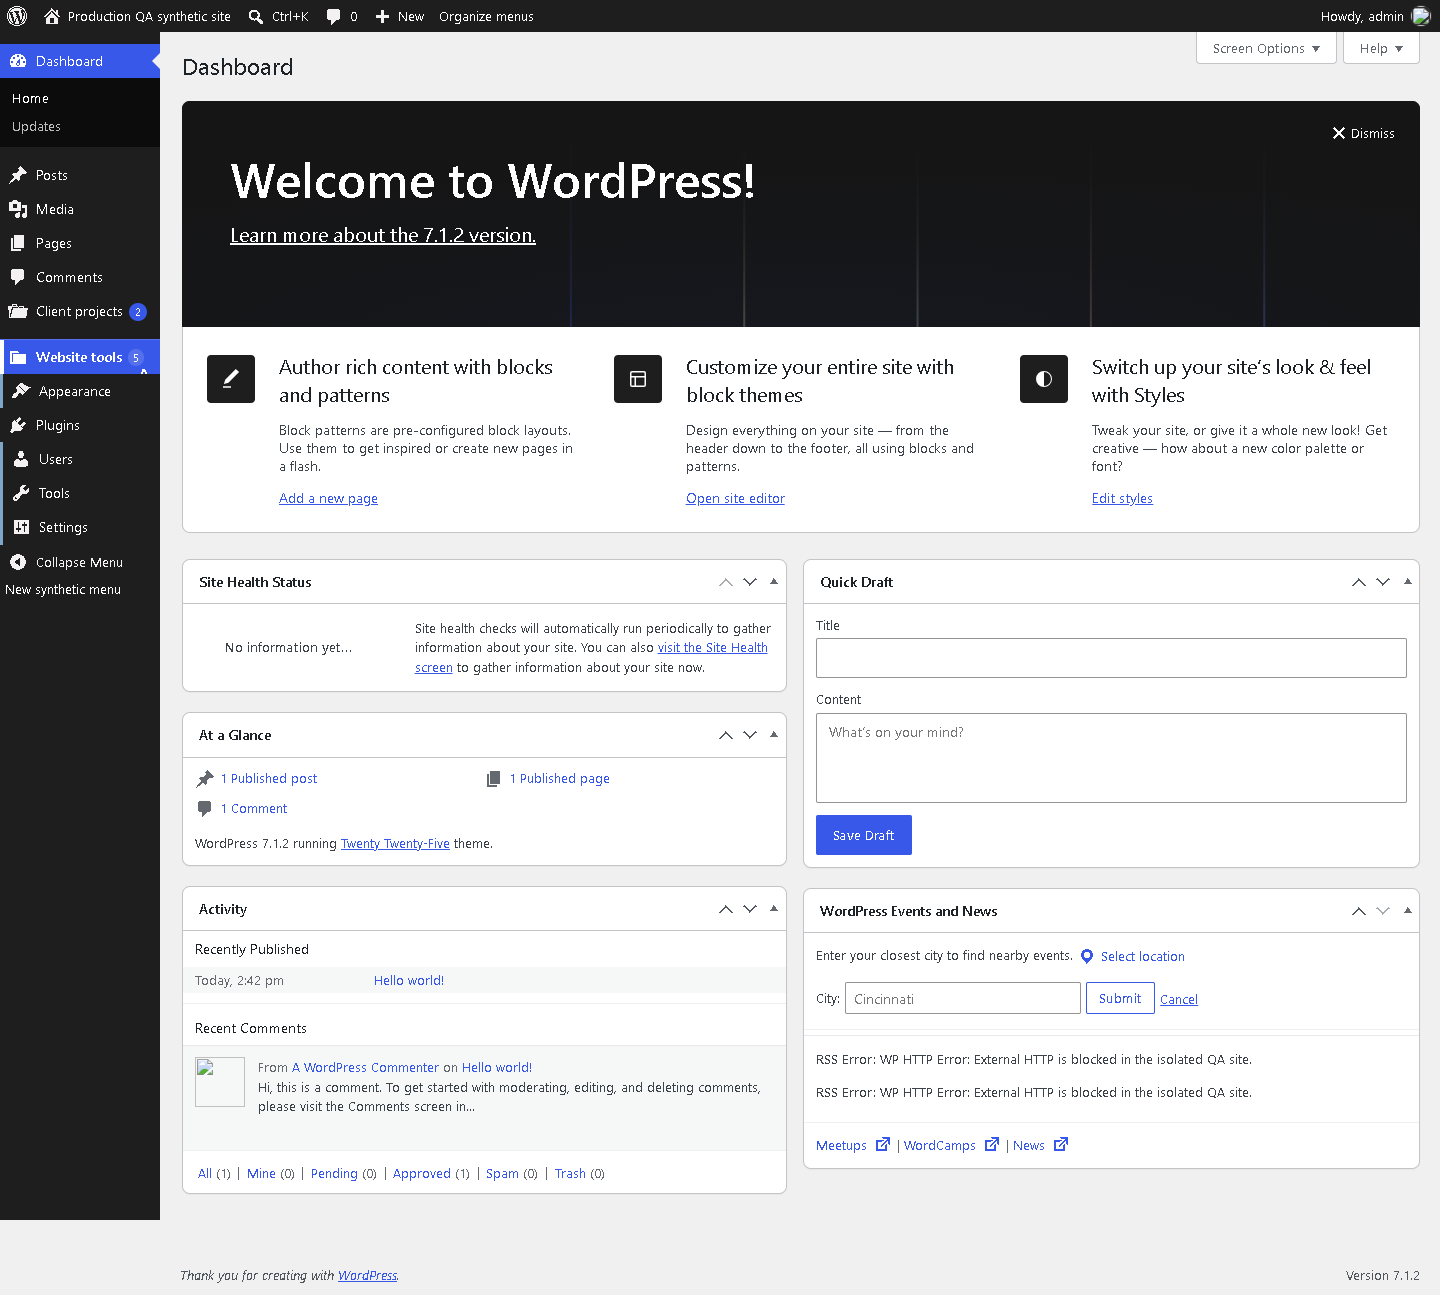
Move through the sidebar using the keyboard, open the group and follow a link. Check that focus remains visible and that the client can reach the same destinations without relying on a mouse. Resize the browser to the smaller screen the client is likely to use and inspect longer group names.
On a test site, also check the fallback with JavaScript disabled: groups remain expanded and permitted links stay available. Live preview and search need JavaScript, so do not confuse their absence with a missing permission.
5. Demonstrate recovery once
Show the maintainer how to open Settings > Admin Organizer using the toolbar or the plugin’s Settings link. Turning off Organize the sidebar and saving restores native navigation while retaining choices. Deactivation also restores the usual navigation and styling.
End the handover with a short list of the daily destinations and the recovery route. Recheck it after adding a plugin: newly discovered menus remain directly accessible until you decide where they belong.
Continue with the plugin
Explore Alharthiweb Admin Organizer, read the complete setup guide, or download Free from WordPress.org. This guide covers the Free workflow in version 1.3.6.
A Telegram order alert is useful only when the receiving team knows what to do with it. Before handing a WooCommerce store to packing staff, test the complete journey from a synthetic order to the correct chat. This checklist focuses on day-to-day handover after the bot connection is configured.
1. Decide who should receive the alert
Choose one destination for the Free workflow and check its actual membership. A shared packing chat should contain the people responsible for preparing orders. Use the existing setup guide below to verify the bot and pair the destination before testing order delivery.
Write down who maintains the bot connection and who can check the WooCommerce order when a message is unclear. Staff can read the Telegram summary without a WordPress account; an admin order link still needs an authorized login.
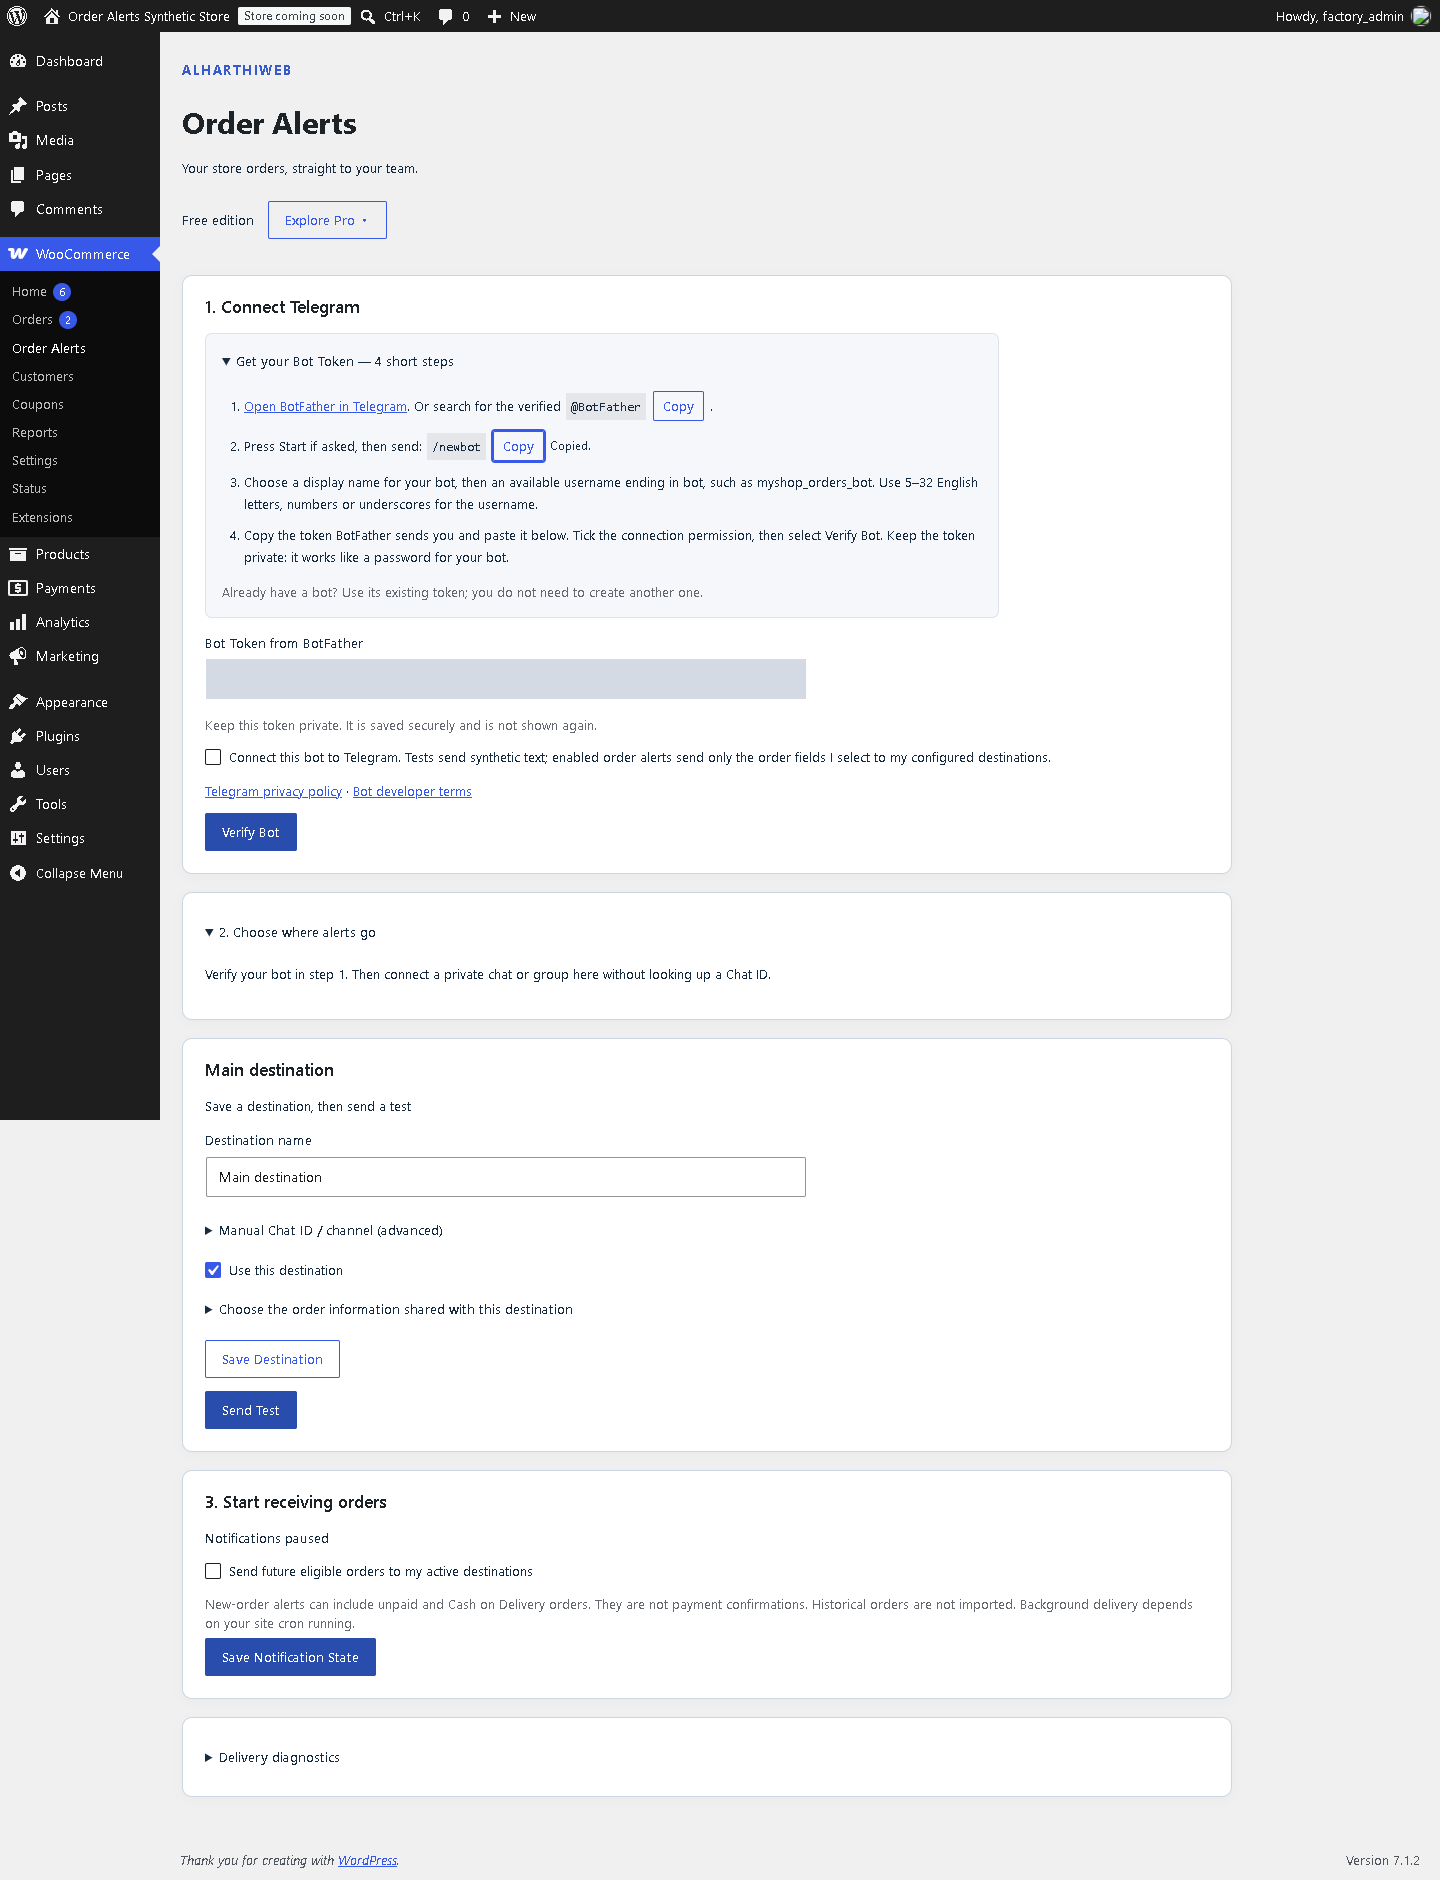
2. Select the information the team actually uses
Start with products, variations and quantities. Decide whether the recipient also needs customer contact details, address or notes before enabling those optional fields. Do not use a real customer’s order for the initial exercise.
Create a synthetic order with two different products and, if your store uses them, a variation. Include a test note only if that field is part of the agreed workflow. Compare the received names and quantities with the WooCommerce order rather than assuming a successful test message checks every order field.
3. Separate an order alert from permission to dispatch
A new-order notification can describe an unpaid or Cash on Delivery order. It is not a payment receipt. Give the team a clear instruction for checking the order’s payment and fulfillment status before dispatch. The correct rule depends on your store’s own payment workflow.
If a long notification is shortened, staff should use an authorized source for the remaining order details. Do not treat a truncated summary as the complete packing list.
4. Agree on a missing-message procedure
- Check the intended Telegram destination and the matching WooCommerce order.
- Inspect Delivery diagnostics to distinguish an accepted request from a failure, retry or uncertain result.
- For an uncertain result, inspect the chat before manually resending; the first message may already exist.
- If background delivery stops, ask the site maintainer to check WordPress scheduled tasks and the saved connection.
Telegram accepting a request does not mean someone read it. Decide how the team acknowledges work using its existing process. Avoid testing repeated resends against real orders merely to see whether notifications appear.
5. Leave a short handover note
- The intended chat and responsible maintainer.
- The fields staff should expect and where to find omitted details.
- The store’s dispatch check for unpaid and Cash on Delivery orders.
- What to do when a message is missing, shortened or uncertain.
Repeat the synthetic-order check after a material change to checkout fields, the destination or the bot connection. The basic one-destination checklist works in Free; separate destinations and status-change workflows belong to Pro.
Continue with the plugin
Explore Alharthiweb Order Alerts, read the complete setup guide, or download Free from WordPress.org. This guide covers the Free workflow in version 1.1.4.
A label can look correct in the preview and still print at the wrong size. Before changing your product data, check the label dimensions and the browser print settings. This guide uses Alharthiweb Barcode Labels and starts with a single test label.
1. Match the label dimensions to your stock
Measure the physical label or read its packaging. In the label designer, choose a matching preset, such as 50 × 30 mm or 40 × 25 mm, or enter the required custom dimensions. A preset is a starting point: confirm that it matches the paper you actually loaded.
2. Preview one product
Open WooCommerce → Alharthiweb Barcode Labels, select one product and set its copies to one. Check the product name, barcode value and any visible price in the preview. Use a product with an identifier supported by your selected barcode format. Do not alter an SKU merely to make a print test fit.
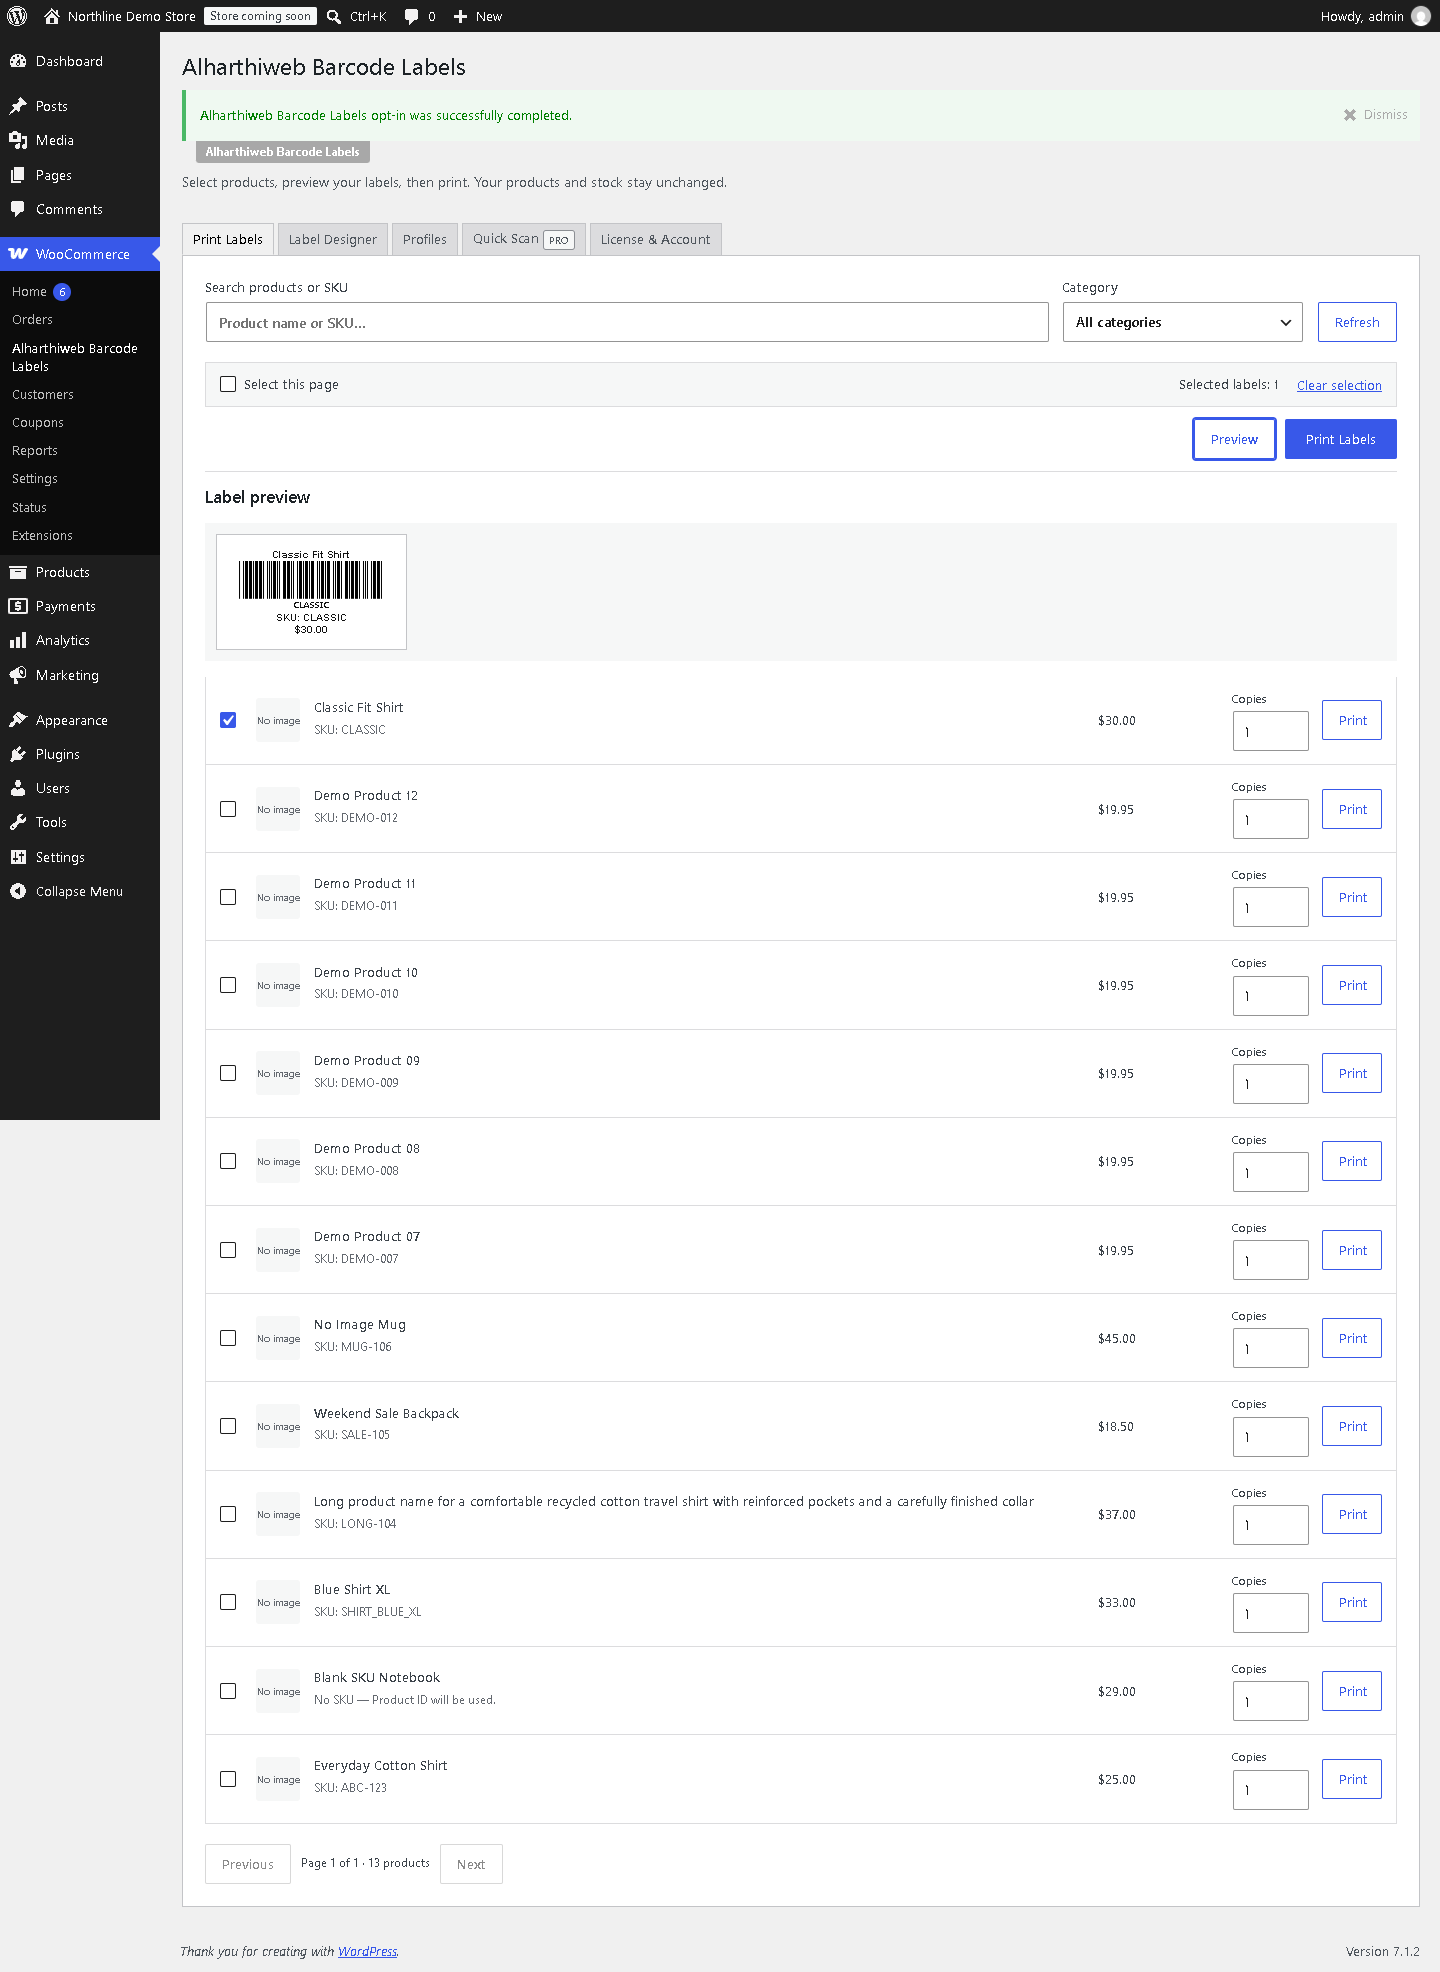
3. Check the browser print dialog
Open the plugin print document, then its Print Labels action. Select the paper size used by your printer. Start with 100% or Actual size rather than a fit-to-page option, and turn off browser headers and footers. Browser and printer-driver labels differ, so verify the settings shown by your own setup.
4. Print and measure one label
Compare the printed width and height with your intended dimensions. If both dimensions have changed by the same proportion, recheck scaling. If the size is right but the position is wrong, inspect the paper orientation and margins. Adjust one setting at a time and repeat the single-label test before printing the batch.
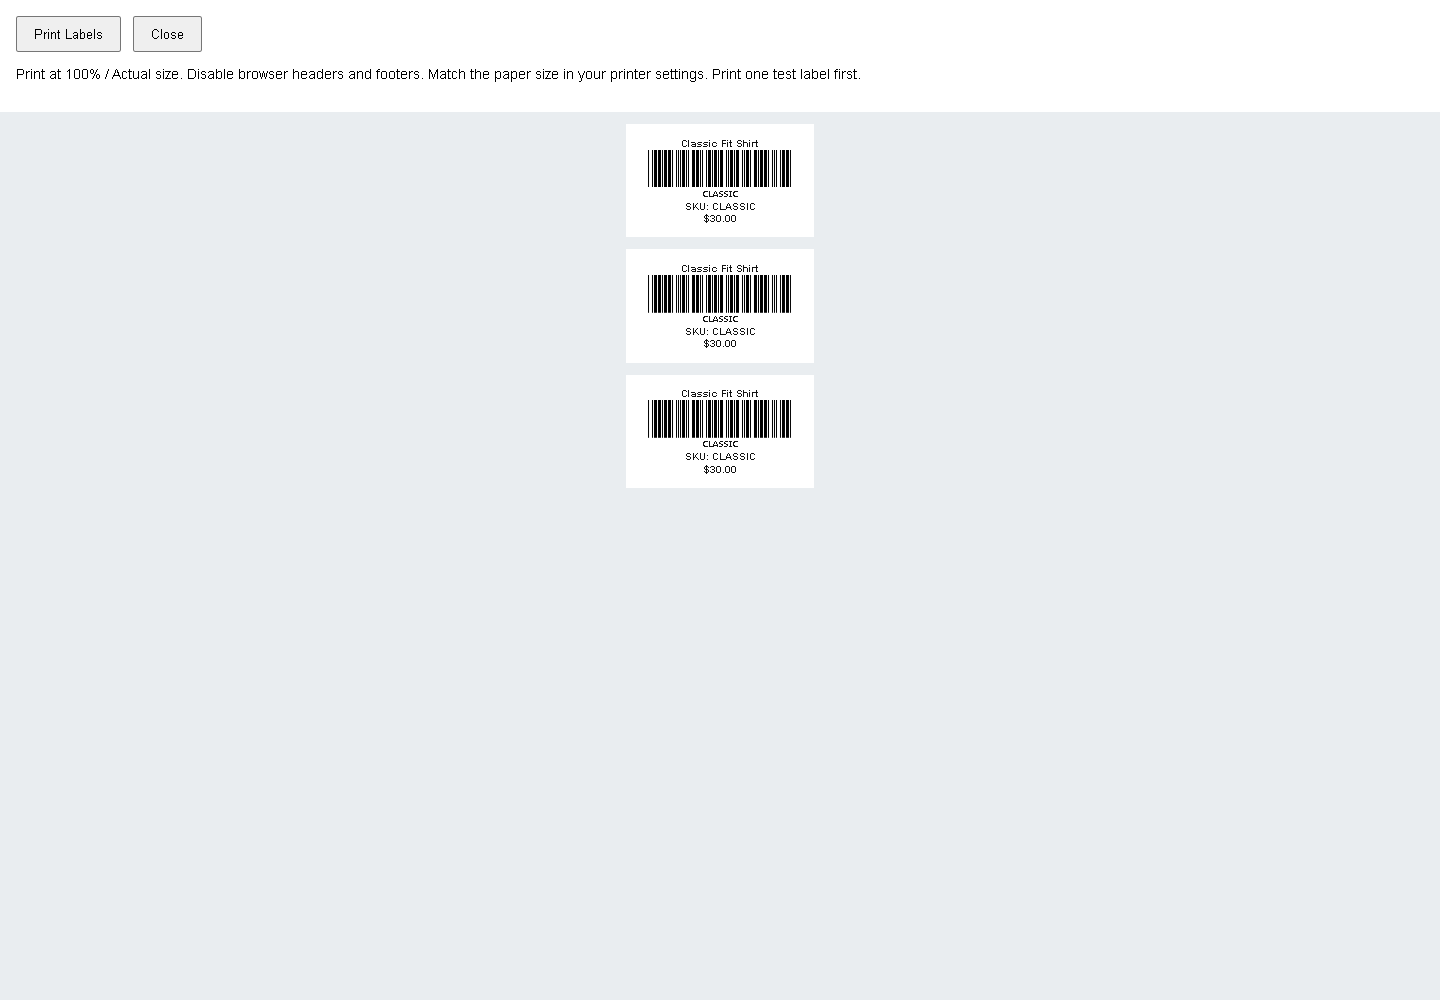
5. Save a repeatable workflow
Free supports label previews, chosen copy quantities and built-in presets. Pro also offers saved custom printer designs. Once a small test is correct, use the same paper and print settings for the larger run. Universal printer compatibility is not claimed; hardware, drivers and browser settings can affect the result.
6. Check alignment across a sheet
When using sheet labels, test a row near the top and another near the bottom. A growing offset can point to an incorrect row gap or paper setting even when the first label looks right. Check horizontal spacing separately. Keep one written note of the preset, paper, orientation and scale that worked so a different operator can repeat the test.
Finally, scan a printed test label with the scanner used in your own workflow. A correct preview or successful print does not by itself prove that the physical barcode is readable. Inspect clipping and print contrast before increasing the number of copies.
Continue with the plugin
Explore Alharthiweb Barcode Labels, read the complete setup guide, or download Free from WordPress.org. This guide covers the Free workflow in version 0.4.5.